DIY Kitchen Cabinet Plate Rack
If you’ve been here long enough then you know I am all about making our home more functional while also adding some character. I may be slow to add color, but I have figured out how to add functionality even in small ways.
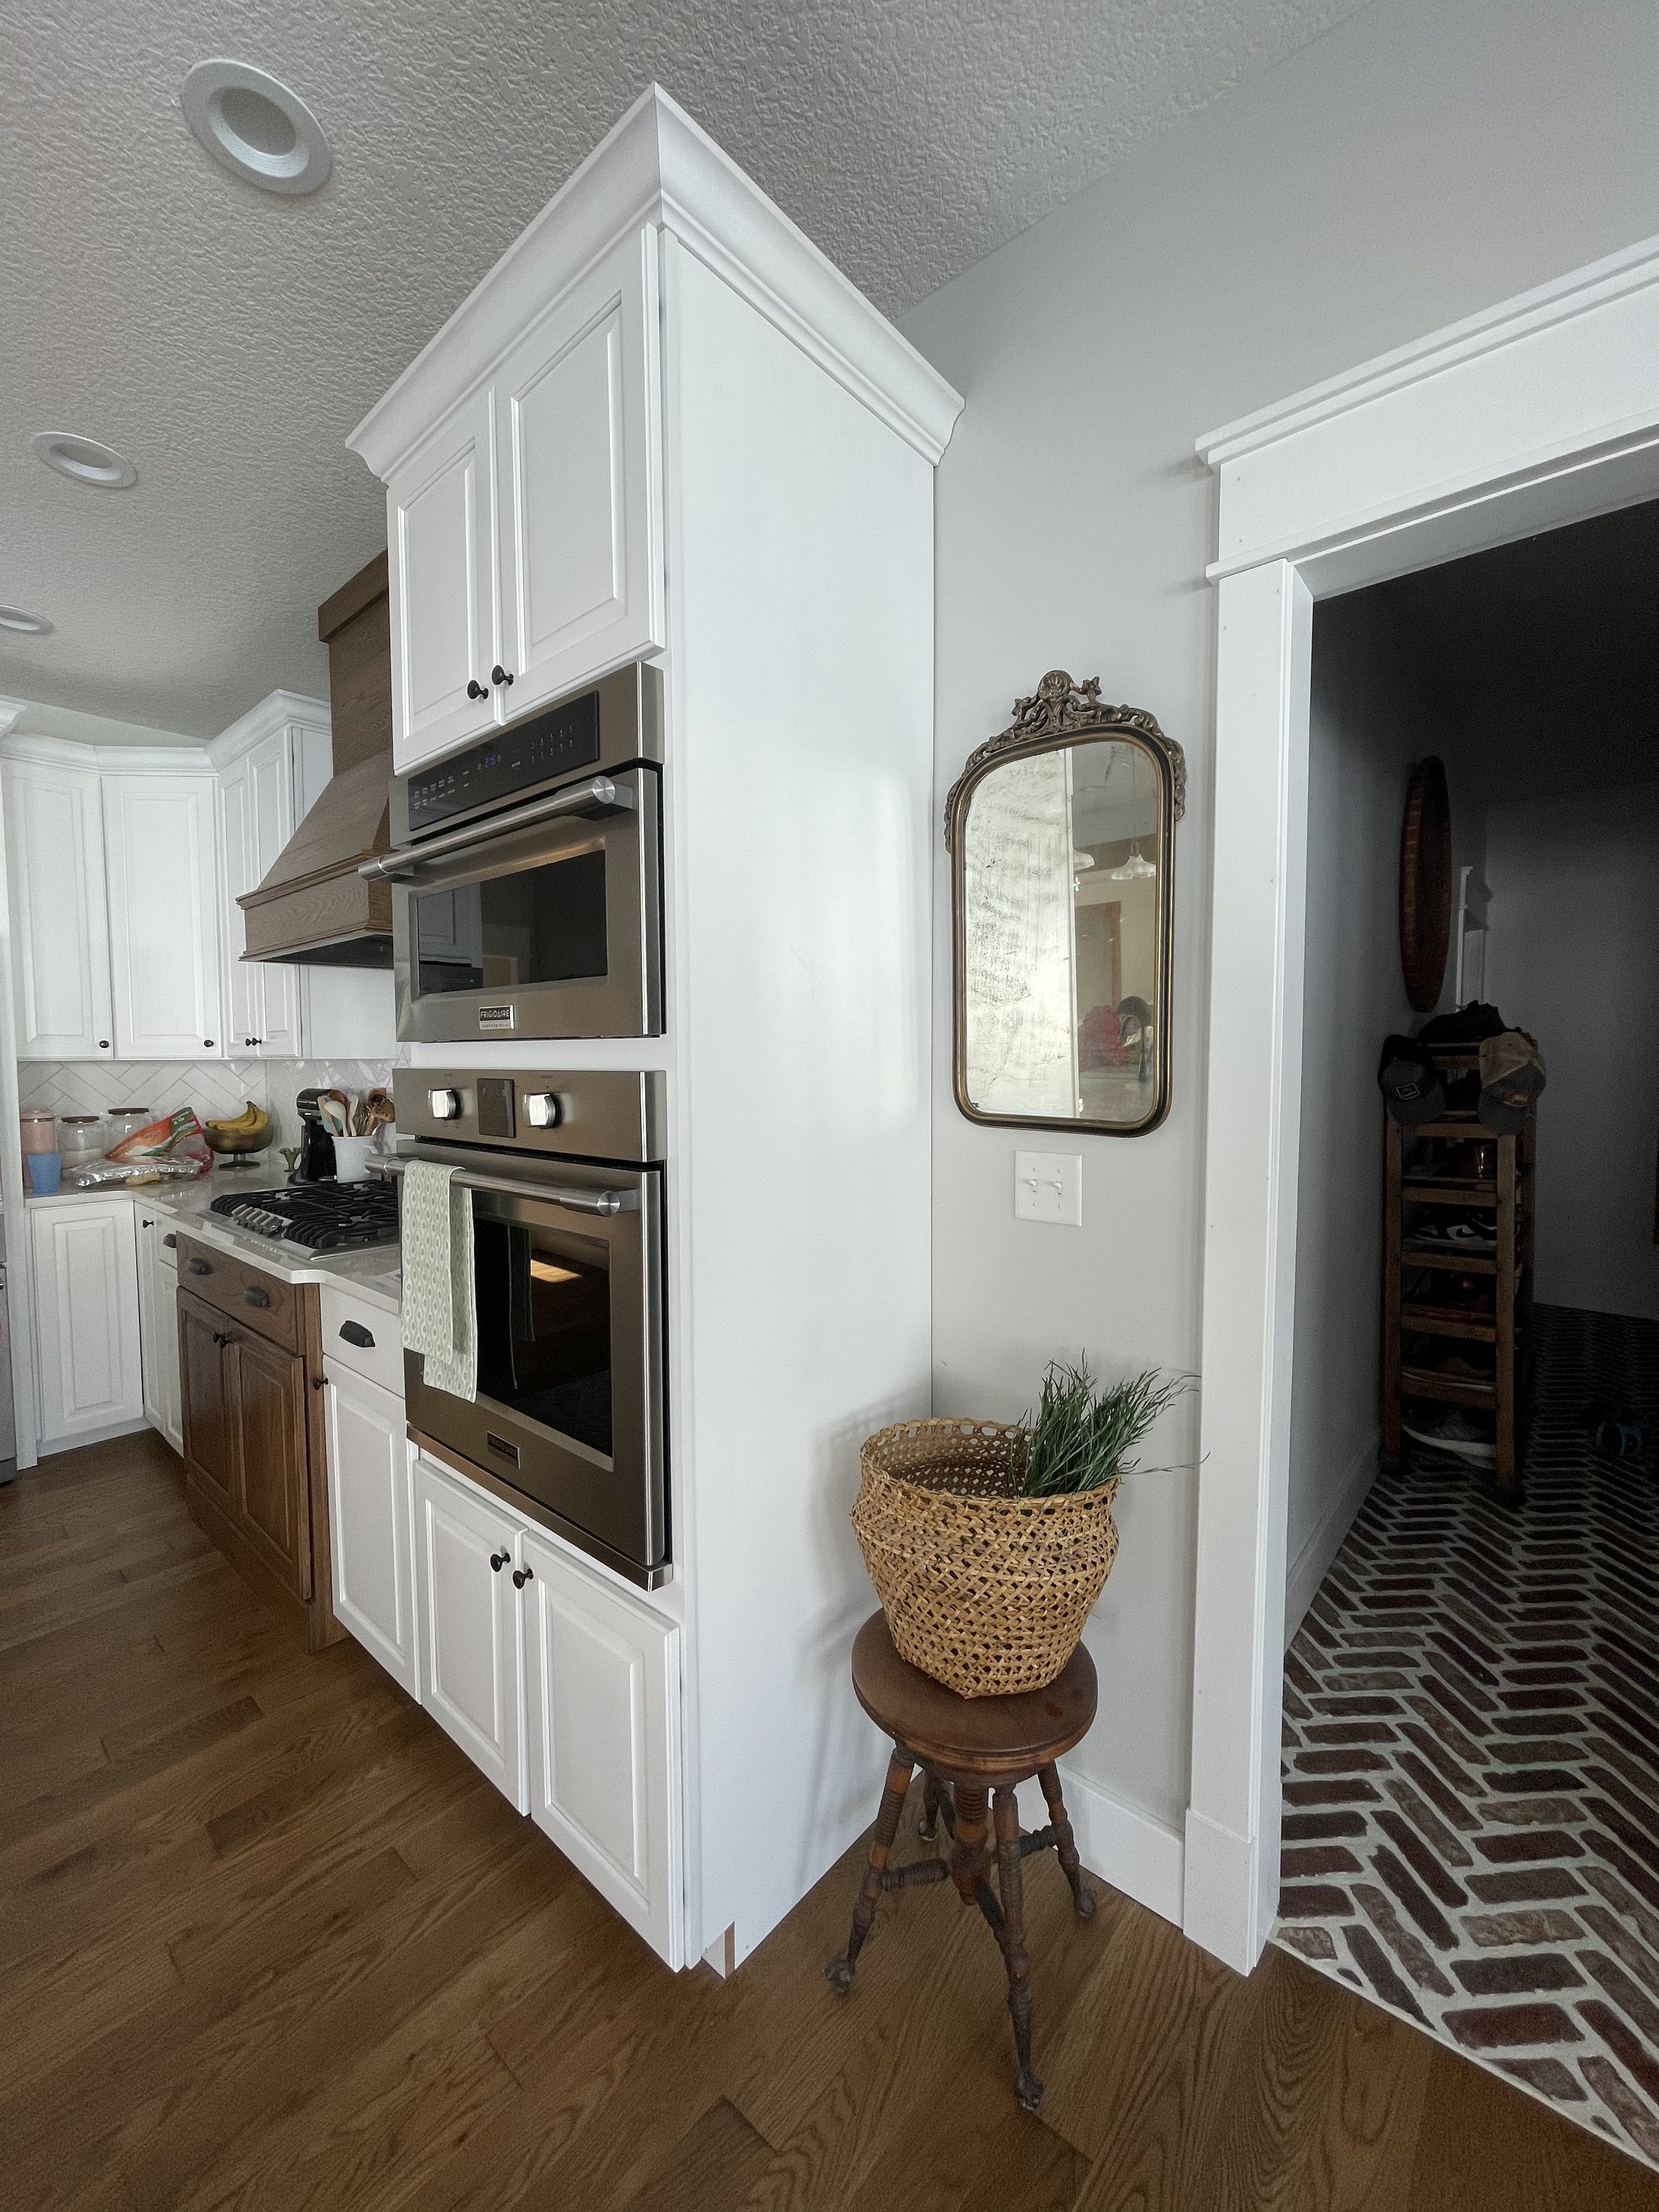
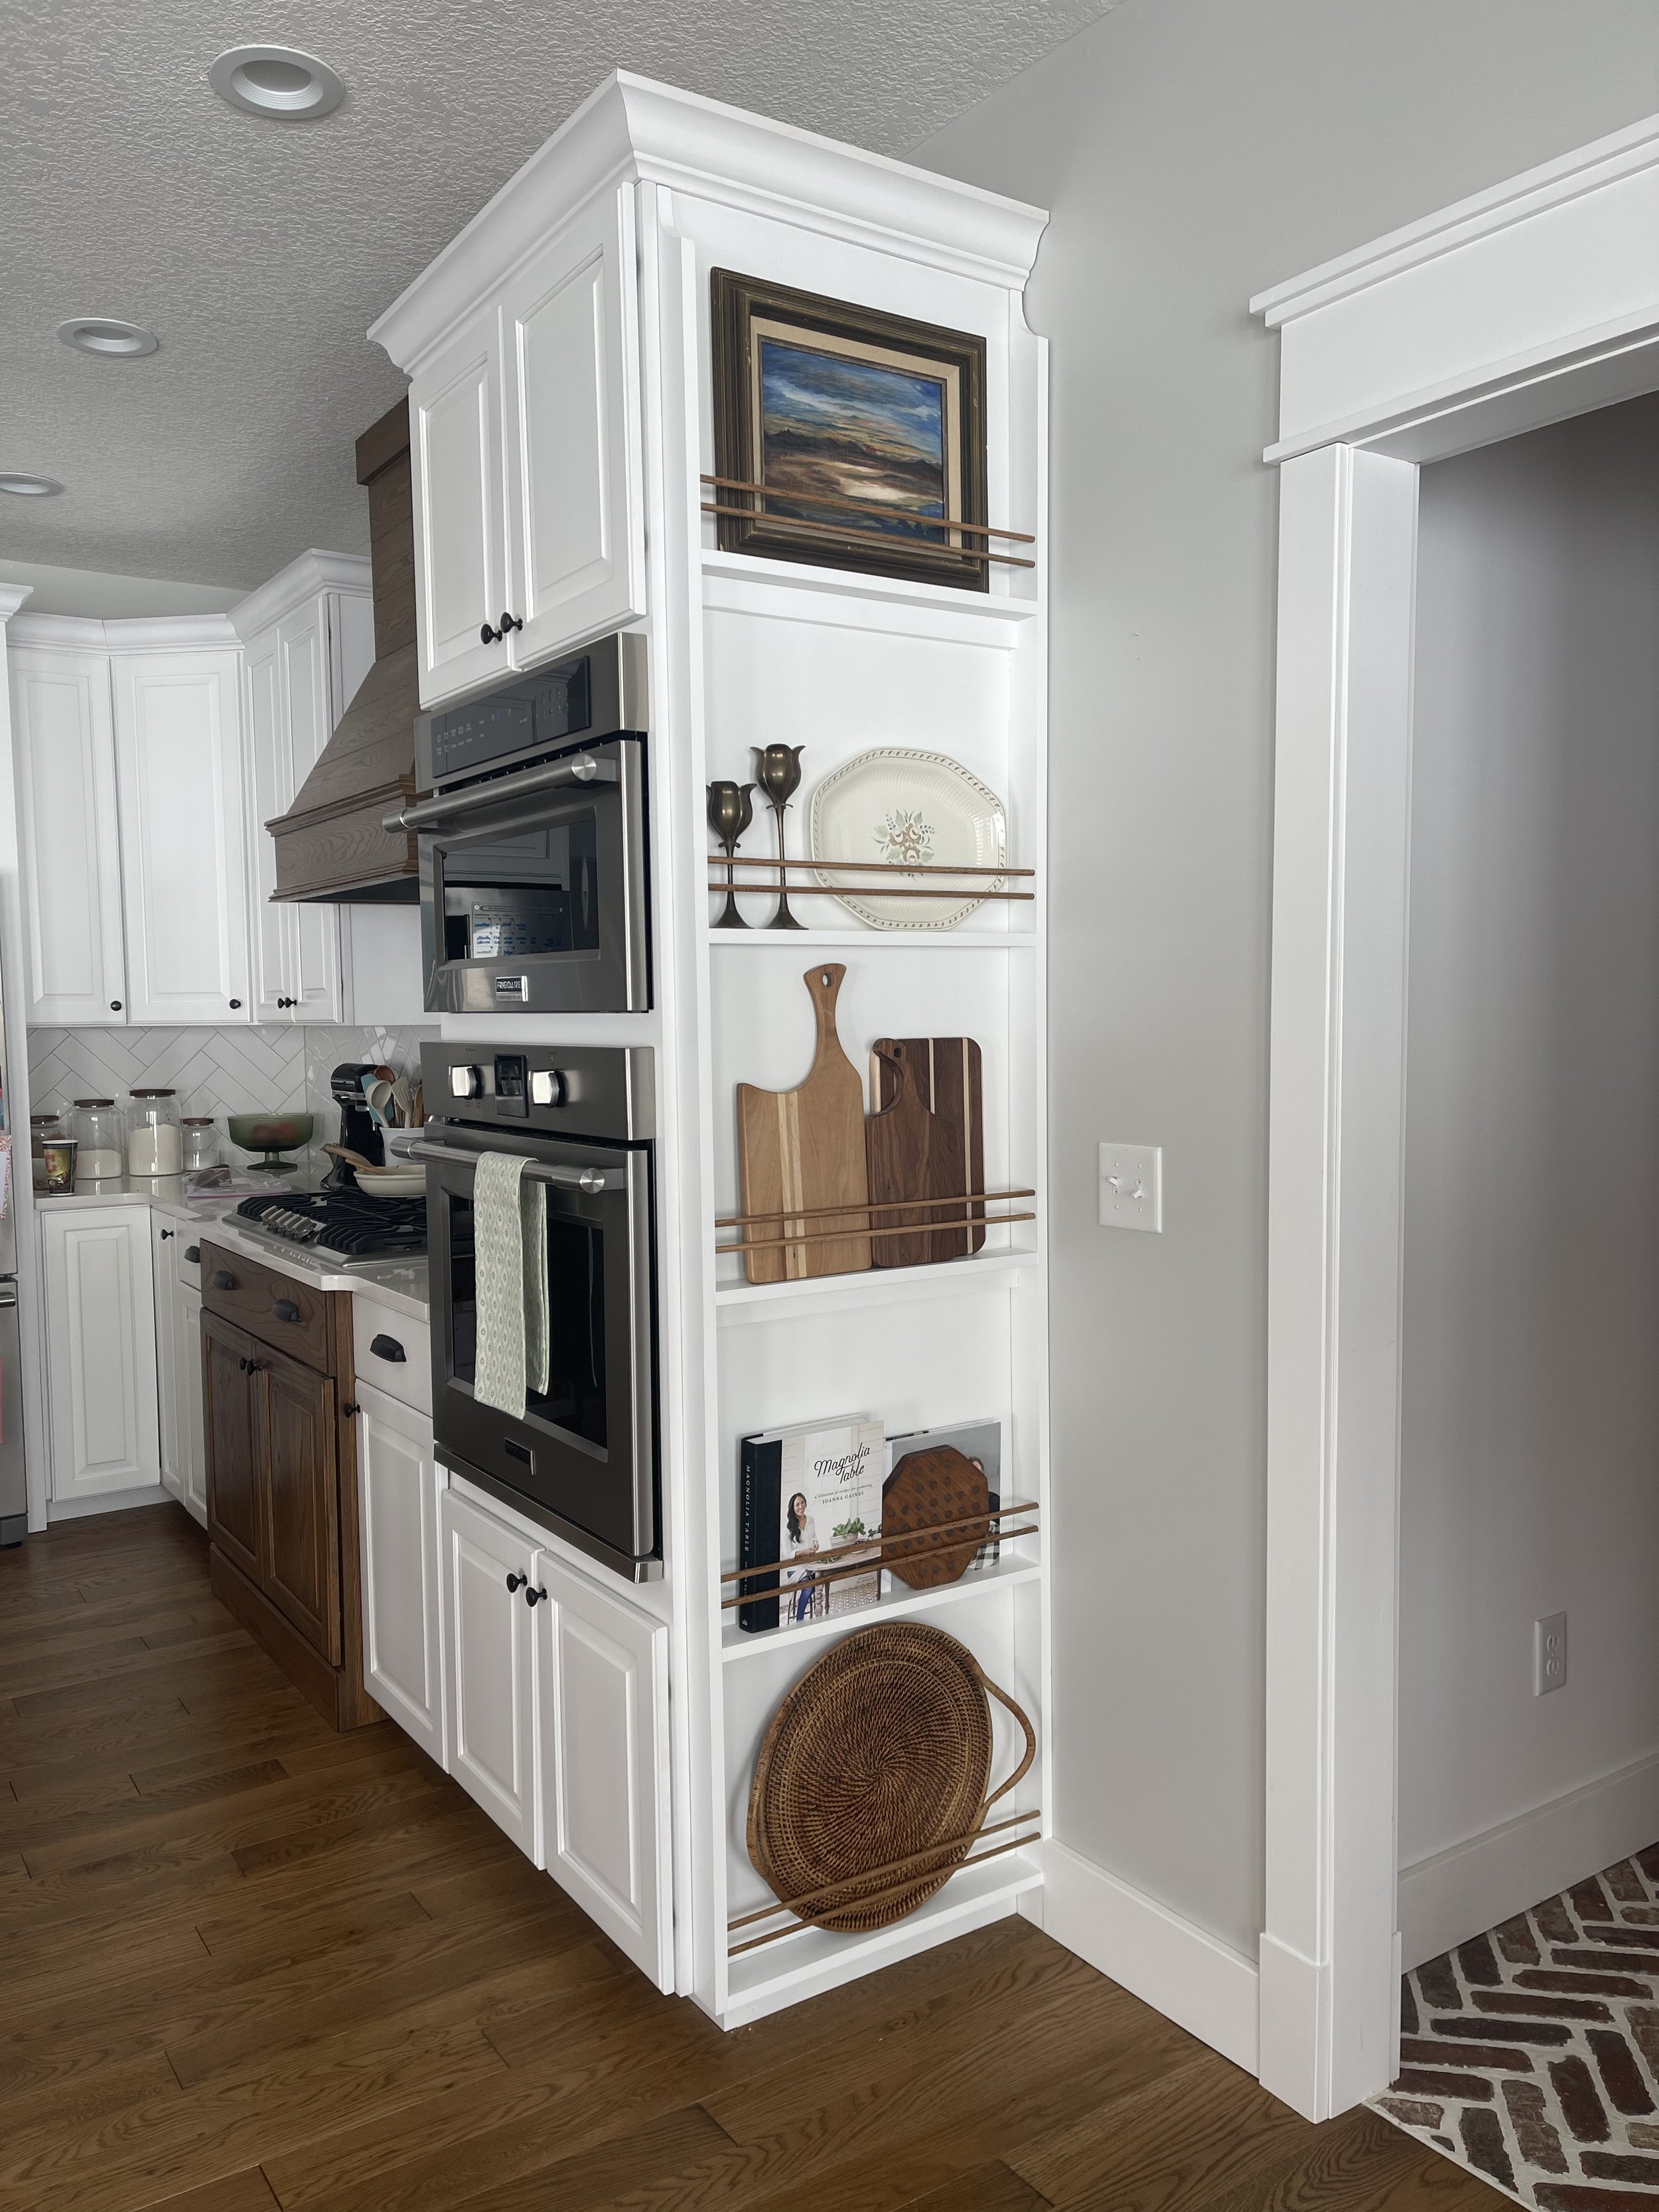
When I came across a plate rack image on Pinterest, I knew that was just what we needed in our kitchen. Our oven/microwave combo cabinet is just bare on one side- open to our mudroom and dining room. It’s been minimally decorated until now, but I always felt like something was missing. See before & after photos below…
If you have kitchen cabinets that are bare on the end like ours then this may a great project for you, too! You only need to use up a few inches of space and what an impact that has. I decided to go with two colors, white + stained. (Suprise, surprise, right?! Story of our whole house.) You may just want it all one color, but that’s the great part- you can custom make one to fit your style and kitchen. I’ve included a “DIY Recipe” that we used for this project. It’s an organized view of the project which spells out the objective, plan, and tools & materials. I’m sharing it with you in hopes that it will help!
Once you have gathered your materials, here’s what you need to do…
How to DIY a Plate Rack:
CUT wood to length needed for your cabinet. For our cabinet, we cut (2) 1x3” boards to 93” long and (5) to 21 3/4” long. Then we cut (10) 3/8” dowel rods to 22 1/8” long. We also added (2) brace pieces which were 1x2” cut to 21 3/4” long. John also cut a curve at the top of each vertical board. This was purely for aesthetics since we have crown molding at the top of our cabinets. Pro Tip: if there are any holes, fill those now and then allow to dry before sanding smooth.
PRIME each board first then paint. If staining, then you could use wood conditioner first or just stain. We decided to prime and paint before assembling the rack. It is probably easier that way, but again, do whatever works for you! However you decide to finish it, you only have to paint or stain three sides of each board because one will be against your cabinets.
ASSEMBLE your pieces of wood and attach them with wood glue and screws. You can make the distance of the shelves however you would like. We chose to evenly distribute ours at about 17 7/8” in between each shelf. We added the two brace pieces to the bottom of the first and third shelves. To do this, John screwed from the shelf down into the brace.
INSTALL rack onto cabinet. To do this we just screwed directly into the cabinet through the brace pieces mentioned above. At this point we then filled all the holes from the screws. Once dry, I sanded down the fill spots and John painted over them. We installed the stained dowel rods last. You could definitely do this while assembling the rack, but this is just how we did it. John drilled the holes into either side of the inside of the vertical boards. He measured up 2 1/8” from each shelf to the center of the hole for the first dowel rod and then 3 1/2” from the shelf to the center of the hole for the second dowel. He drilled in a depth of about 3/8’ on one side and then 1/2”. The reason why he did it that way was because he needed to be able to push the dowel in far enough on one side to clear the vertical board on the other side then he could center the dowel once in both holes. (I hope that makes sense.)
Once we had the dowel rods in, it was time to style. (My favorite part!) I just used things from around the kitchen and house. (Watch HERE to see more detail about what I used to decorate.) John made the cutting boards so I love being able to display them where I can see them all the time. I am hoping to find a couple more platters because I could use them and they would look great layered, too.
If you try this project, make sure to come back and let me know! I’d LOVE to see your pictures.
Happy DIYing,
Megan + John
Get the look! All items below are linked in my Amazon storefront…


